
Step 1: Site Survey and Preparation Planning
Every professional resin driveway installation begins with a site survey. The installer visits your property to assess the existing surface, measure the area, discuss colour and finish preferences, and identify any drainage, access, or edge-detail requirements.
During the survey, the installer determines whether the existing base (concrete, tarmac, or compacted aggregate) is suitable for a resin overlay, or whether partial or full groundwork is needed. This assessment is the foundation of an accurate quote.
After the survey, you receive a written, itemised quote detailing every element of the work: preparation, materials, labour, edge restraints, drainage modifications, waste removal, and warranty terms.
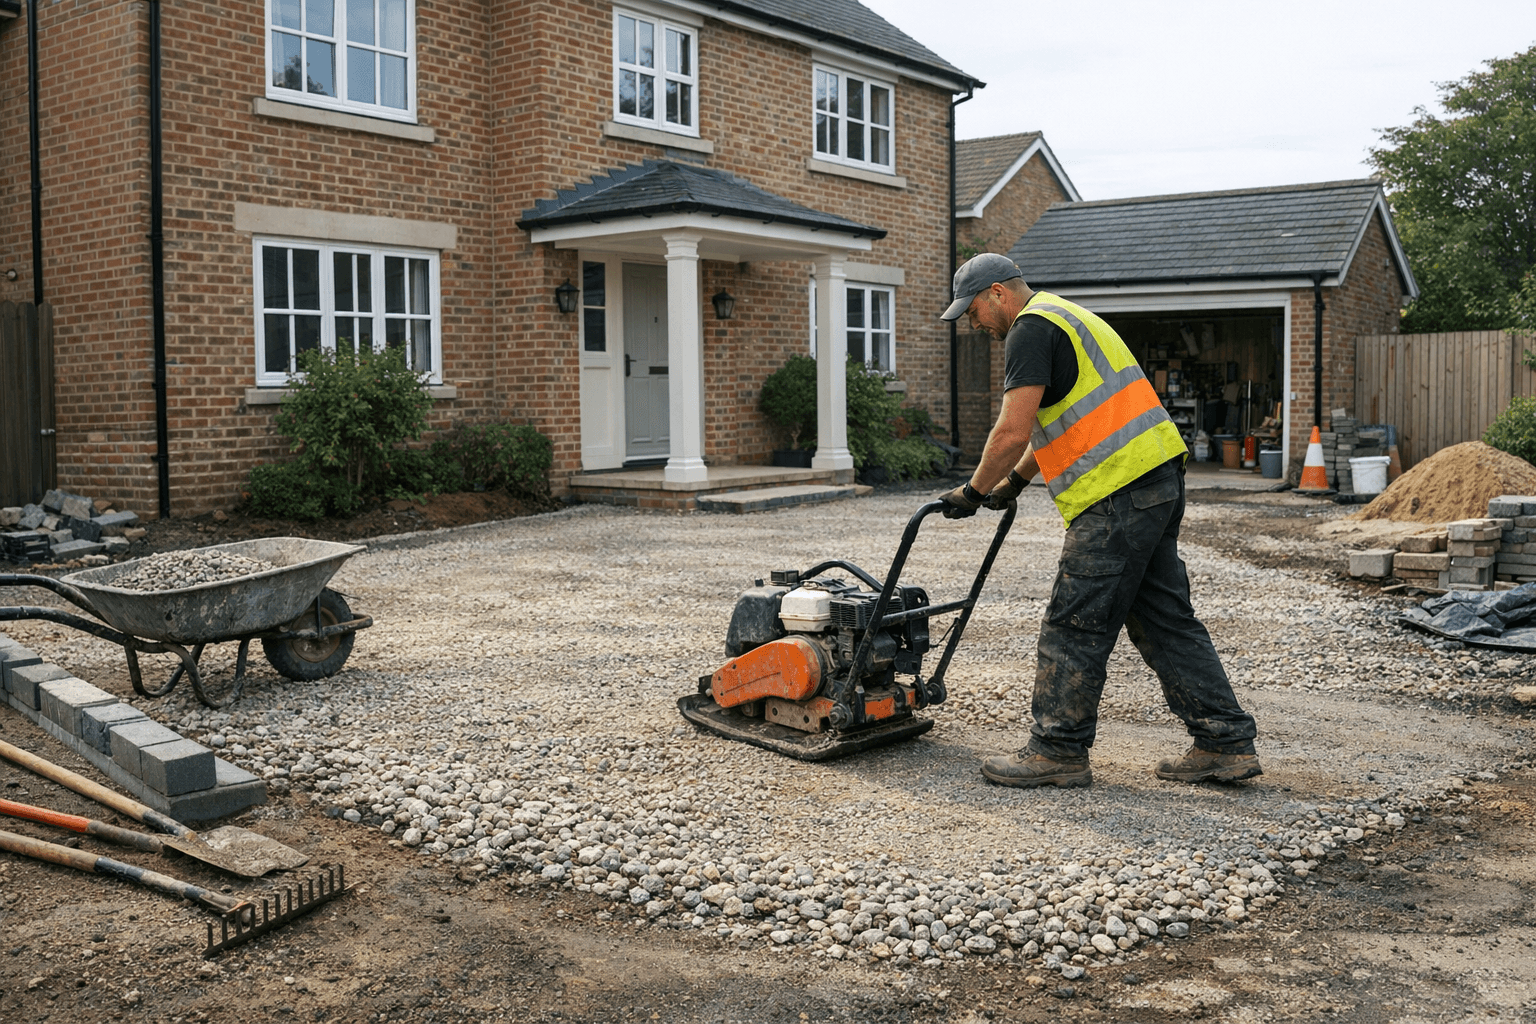
Step 2: Groundwork and Sub-Base Preparation
If the existing surface is being retained as a base, the preparation involves cleaning, repairing any cracks or damaged areas, and ensuring proper levels for drainage. Loose or flaking material is removed, and any low spots are filled and compacted.
For new builds or situations where the existing base is unsuitable, full groundwork begins with excavation to the required depth (typically 200mm to 300mm), followed by installation of a geotextile membrane, compacted aggregate sub-base layers, and a final open-textured tarmac or concrete surface that the resin will bond to.
Sub-base preparation is the most critical phase of the entire project. The vast majority of resin driveway failures — cracking, sinking, delamination — trace back to inadequate base preparation. A reputable installer will not rush this stage.
Need your installation scope reviewed before you request quotes?
Step 3: Edge Restraints and Borders
Before the resin is laid, aluminium or steel edge restraints are fixed around the perimeter of the driveway. These contain the resin during application, create a clean finished edge, and prevent the surface from spreading or crumbling at the boundaries over time.
Edge restraints can be straight, curved, or stepped to follow the driveway shape. For designs that incorporate contrasting borders — such as a resin driveway with a block paving perimeter — the border materials are installed at this stage.
Step 4: Resin and Aggregate Mixing and Application
The resin and aggregate are combined in a forced-action mixer on site. The ratio must be precise — too much resin creates a smooth but potentially slippery surface, too little leaves loose stones. Professional installers use calibrated equipment to ensure consistency.
The mixed material is poured onto the prepared surface and hand-trowelled to a uniform depth of 15mm to 18mm (18mm is standard for driveways). The crew works in sections, maintaining a wet edge to prevent visible joints between pours.
Temperature and humidity are closely monitored during application. Resin should not be laid in temperatures below 5°C, in heavy rain, or in conditions where dew is likely before the surface cures. Professional installers check weather forecasts and will reschedule rather than risk a compromised finish.
Step 5: Curing and First Use
After application, the resin surface needs to cure before use. Foot traffic is typically safe after 6 to 12 hours depending on temperature and humidity. Vehicle traffic should be avoided for at least 24 to 48 hours to allow full hardening.
During curing, the surface should be protected from rain (if forecast) and kept free of debris. Most professional installations include temporary protection measures if there is any risk of rain within the first few hours.
Once cured, the driveway is immediately functional and requires no further treatment. There is no sealing step, no painting, and no additional coatings needed — the surface is ready to use as installed.
Installation planning
Get a Step-by-Step Installation Quote
Tell us your current surface and size for a staged plan and fixed-scope quote.
Aftercare and Long-Term Maintenance
After installation, keep vehicles off the surface for the recommended curing period and avoid placing heavy objects (skips, scaffolding supports) on it without protective boards.
For ongoing maintenance, sweep or hose the surface periodically to remove leaf litter and organic debris. An annual gentle pressure wash removes any algae or moss buildup, particularly in shaded areas. Avoid using harsh chemical cleaners, which can damage the resin binder.
If any damage does occur — from an impact, a chemical spill, or ground movement — small areas can usually be patch-repaired by a professional without replacing the entire surface.